Lego Track Ballasting
Many posts have been written on ballasting LEGO tracks. They all mention added ballast is “piece intensive”, and the examples I found online use a lot of LEGO pieces.
I still went ahead and I think I’ve found a variant that still looks good, and is (slightly) optimized to reduce the number of bricks. For straight track it consists out a two layers of plates. Curves and switches have 1 layer and need to be propped up with tiles (when attaching to baseplates).
Straight Track⌗
For straight track the ballasting is relatively simple. The following pieces are needed:
- 10 * 8x2 plates
- 4 * 2x4 plates (used on the top side)
- 1 * 2x2 plates
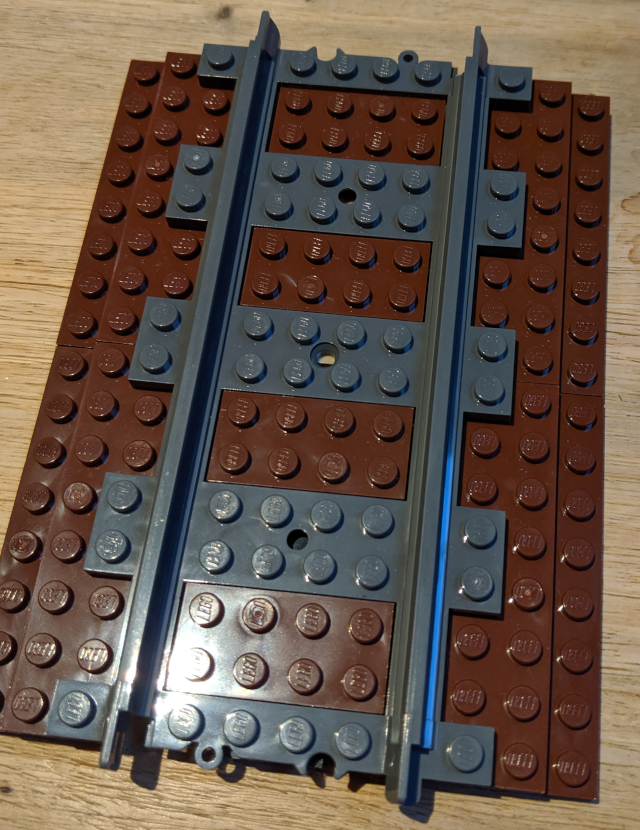
8 of the 8x2s will be visible (those should be the color of your ballast), the remaining 2 can be any color. The 4 2x4’s are also visibile. In the example below I used reddish brown.
Attaching the ballast to the track is extremely simple:
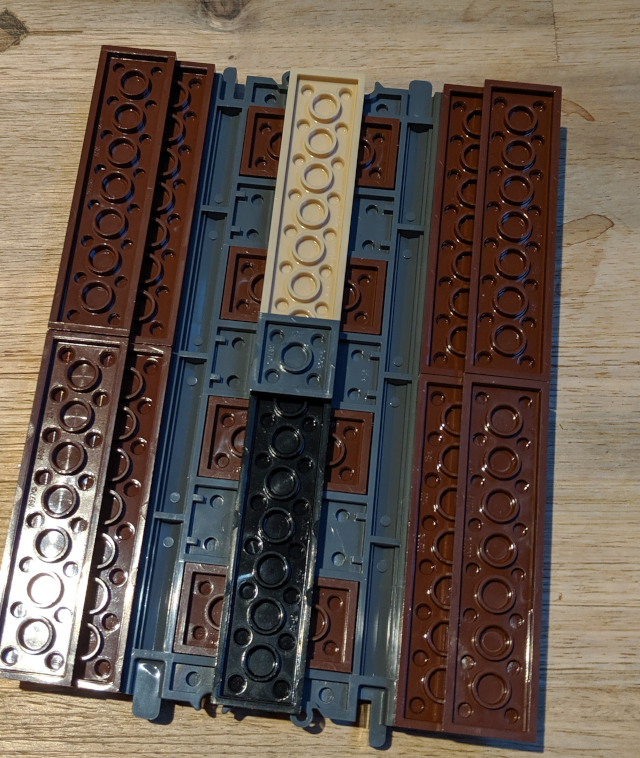
And bottom:
Curved Track⌗
For curved track things got some what trickier, because of the, uh, curve. With much inspiration from online designs, I finally settled on a symmetrical design, piece count is not insane (but still a lot - you will have many curves in your setup).
- 3 * 4x4 plates
- 3 * 2x4 plates
- 6 * 2x3 plates
- 4 * 1x3 plates
- 4 * 1x4 plates (used on the top side)
All these pieces are visible so they must be of the same color.
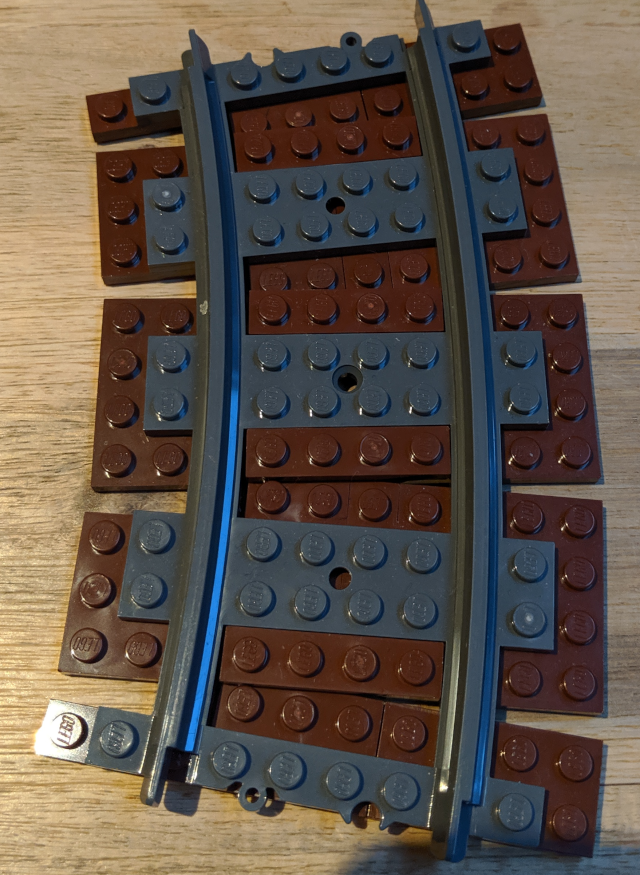
From above it looks like this, the 4 1x4s are only attached with 1 stud and hide the remaining gaps, rest of the gaps will need to be obscured with tiles.
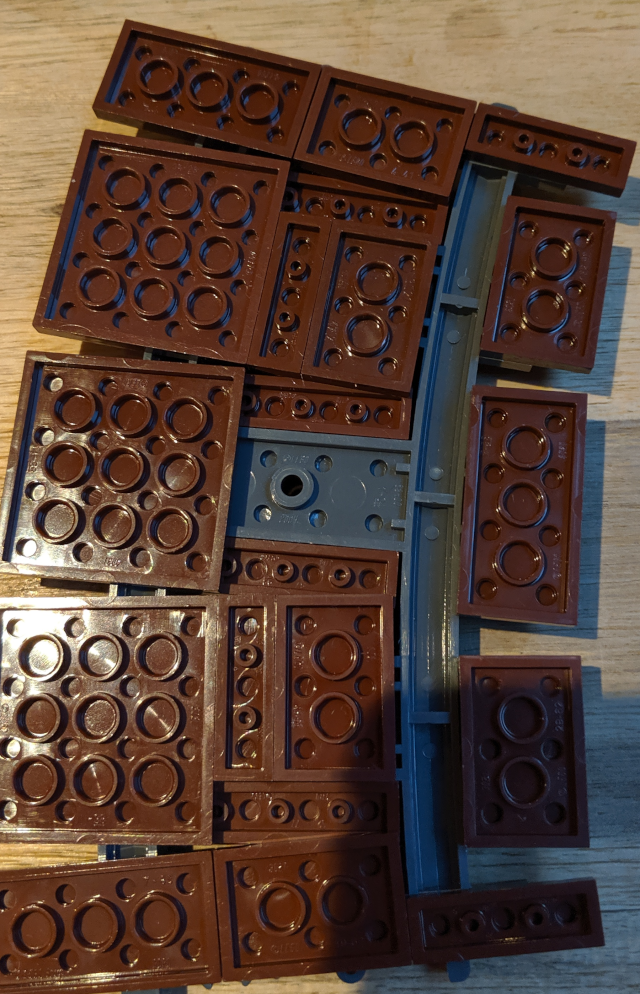
Bottom is more interesting:
Not shown here (‘cause I haven’t done it yet) is to use tiles to finish the second layer when putting these track elements on a baseplate. Figuring out where to put the tiles is a bit of trail and error depending how the curve needs to be attached to the baseplate.
I’ll detail switches in a future post; I’ve got one attached to a baseplate, but not 100% happy with the ballasting and the number of pieces used.